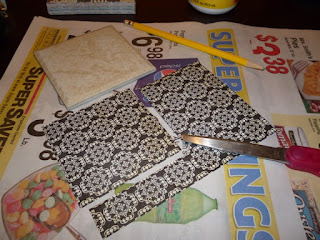
Perhaps if I start blogging about crafting projects, I'll do more of them. I know I already told you about this project, but Holly wanted instructions. Well, my friend, your wish is my command ... even if it takes me a month to do it!
Step 1: Gather all your materials—4x4 tiles, scrapbooking paper, felt, Mod Podge, clear spray paint, glue gun & glue sticks, pencil, paint brush (or sponge), marker, scissors, newsprint (or other scratch paper), and a movie to watch while you work.
Step 2: Cut scrapbooking paper into the size needed to cover your tile. (I like to cover the whole tile with one piece of paper; you can also create a mosaic of sorts with various pieces of paper.)
Step 3: Working quickly, cover the surface of the tile with Mod Podge. Affix paper to tile.
Step 4: Cover paper with a generous amount of Mod Podge. If the surface of your tile is not completely smooth, you may need to use your fingers to press down the paper and remove any air bubbles. Be sure to paint more Mod Podge over any fingerprints!
Step 5: Allow tiles to dry completely. The white Mod Podge will dry clear.
Step 6: While tiles are drying, measure and cut felt just smaller than the size of the tile.
Step 7: Glue felt to the bottom of the tile.
Step 8: Take tiles outside (or to a well-ventilated area) and spray tops of the tiles. Allow to dry completely.
If you do it with just one piece of paper per tile, the whole process takes an hour or less to complete. And after the initial investment of Mod Podge, spray paint, and scrapbooking paper, the coasters are an incredibly affordable and classy gift!
Friday Night Lights: 1.1 "Pilot"
-
*Series Summary (from IMDb): *The trials and tribulations of small town
Texas football players, their friends, family, and coaching staff. (I love
how su...
11 years ago


Thank you so much, Becky! I am so making these sometime soon!! :)
ReplyDeletei can't remember if i already told you my tip for coasters or not. i didn't see a comment from me on your previous post about them, so i'm guessing not.
ReplyDeletebe careful how you store your coasters. instead of a traditional stacking of one on top of the other with all coasters facing up, i suggest placing every other coaster facing down so that the top of one coaster is touching the top of another and the felt covered bottoms are touching on top of that. (does that make sense?)
i learned this lesson the hard way as the felt bottoms got stuck to the modgepodge covered top of another coaster. damaged pretty much all of them.
Oh those are gorgeous!!! I am going to try this!
ReplyDelete@Very Sleepy Girl
ReplyDeleteThanks for the tip! I would hate to ruin my coasters. I immediately flipped mine around :-)