Showing posts with label pinterest. Show all posts

Monday, September 3, 2012

crafting with blendy & becky: bath bombs

Finally Blendy and I did a craft together again! I'm woefully late in posting, as we did this craft in July ...

Who doesn't love a nice bath? (Okay, so I know a lot of people who don't ... but I sure do!) These bath bombs are easy to make and fun to use. I found the recipe on Pinterest (of course). I'd been wanting to make these bath bombs with Blendy for months—Pinterest tells me I pinned it 28 weeks ago—but we just never got around to it until the Olympics started.

I adapted this recipe from the one found on Pinterest to work with the ingredients I bought.

Step 1: Gather your materials—one 16 ounce box baking soda, 7 ounces of citric acid (I found mine on Amazon), 4 tsp scented massage oil (or 4 tsp olive or unscented massage oil and 10-20 drops essential oil), water in a spray bottle (I used a rinsed out spray gel bottle), mold (I used a 1/3 cup measure), large bowl, whisk, baking sheet.

Step 2: Dump baking soda and citric acid into bowl and whisk to combine.

Step 3: Gradually add oil(s) and mix in. (Essential oil is very strong, so start with just a few drops and then add more until you reach the desired potency.)

Step 4: Spray a little water onto the mixture and whisk in. The amount of water you need will depend on humidity—I only needed two sprays, but in the middle of winter, I'd probably need much more. The mixture is perfect when it will hold together when you squeeze it.
When your mixture looks like this, it's just right.
Step 5: Pack into your mold and gently unmold it onto a cookie sheet.

Step 6: Allow to dry overnight. (Seriously. You'll be tempted to touch the bombs, but you need to leave them be for at least 24 hours. I learned this the hard way!)

Step 7: Store in an airtight container or package individually to give as gifts. Enjoy!

My recipe made eight bath bombs. Each one will fizz for about 45 seconds. It's so much fun to use these—just look at Blendy's delight as we were cleaning up!

If you're looking for a fun, easy project, try out these bath bombs!

Monday, August 6, 2012

recipe: biscoff pretzel bars

I have recently fallen head over heels in love with Biscoff spread. What's that, you ask? It's a spread that has the consistency of peanut butter, and it's made from Biscoff cookies. Apparently, Delta distributes Biscoff cookies on their flights; I found them at World Market. They are crispy, slightly cinnamony, and oh so addictive. I've been following the recipe blog Two Peas & Their Pod for the last several months, and that's where I first heard about Biscoff spread. After drooling over Maria's Biscoff recipes for months, I finally decided to bite the bullet and pay an insane amount of money to buy some Biscoff on Amazon. I tweeted about the spread when it arrived, and Meagan mentioned she'd seen some at her Walmart. So the next time I went, I checked it out ... and there it was, right next to the peanut butter! And several of the jars even had $1 off coupons on them! It's still expensive (regular price is almost $4 for 14 oz.), but so much better than nearly $14 for two jars!

While I could eat an entire jar by the spoonful (and I have), I also wanted to use some in a recipe. So I went to Pinterest. (Where else?) First, I tried this Biscoff Puppy Chow recipe. It was good, but the chocolate and sugar totally overpowered the taste of the Biscoff. For my next attempt, I took this peanut butter bar recipe and adapted it ... a lot. I wanted to be sure the powdered sugar didn't overpower the Biscoff, so using half brown sugar, as the original recipe did, seemed like the way to go. But because Biscoff already is sweet, I didn't use all of the sugar called for in the original recipe. I also cut back on the amount of pretzels and upped the amount of Biscoff (instead of substituting it one-to-one for the peanut butter). And I cut the entire recipe in half ... it would be too dangerous for me to have a 9x13 of this stuff hanging around the house! The end result was quite satisfactory, if I do say so myself!

Biscoff Pretzel Bars
adapted from Chocolate Peanut Butter Pretzel Bars on Make Happy

Bars:
1 c Biscoff spread (I used half creamy/half crunchy, but you could do all of one or the other)
½ c light brown sugar
½ c powdered sugar
¼ c melted butter
1 c crushed pretzels

Topping:

½ c bittersweet chocolate chips (I used Ghirardelli)
1 T butter
1 T creamy Biscoff spread

Line 8x8 pan with parchment paper and set aside. Mix Biscoff spread, sugars, and butter until combined. Add pretzels and stir until incorporated. (The mixture won't form a ball, but it should stick together. If it doesn't, add another tablespoon of butter.) Press mixture into prepared pan and refrigerate while preparing the topping. Place chocolate chips, butter, and Biscoff in a microwavable bowl. Microwave until melted, stirring after each 30-second increment. Spread over bars. Refrigerate until chocolate is set. Lift out of pan and use a sharp knife to cut into bars. Store in refrigerator to keep chocolate from getting too soft. Enjoy!

The Biscoff and pretzels pair very well together. Pretzels are also great dipped
directly into your jar of Biscoff!
This is what you're looking for. It's so, so, so good!

Sunday, June 17, 2012

crafting with blendy & becky: book page flowers

For our May craft, Blendy and I decided to make these book page flowers. I wasn't sure at first if I could make them—we've already established that I'm not naturally very crafty!—but they were surprisingly simple. I couldn't believe how quickly I picked it up, and soon I could form the petals without really thinking.

Rather than give you step-by-step instructions, I'm just going to point you to the site I used. Their pictures make following the directions incredibly easy.

Before we could start making the flowers, I had to decide which book I was willing to tear apart ... not an easy task for someone like me who loves her books! Then I remembered this book. I got it through Vine, and their rules stipulate that reviewers can't give possession of the products received to anyone else, though they can dispose of the product after a certain amount of time. Well, I still had the book on my shelf, and there was no chance I'd ever read it again ... so making book page flowers out of it seemed perfect!

Like I said before, you should go to this origami instruction website for directions, but here are a couple things I learned from making my flowers:
Make a template, then trace as many as you can onto a piece of paper. I found that when I was just measuring (say 4" x 4"), I often wasn't quite accurate ... so each petal of my flower was a slightly different size. Tracing a template eliminated that problem.

Also, use pencil, not pen (as I did), to trace the template. If I didn't fold the petal perfectly, I often had a little black showing through.

At first, the flower making was slow going, but soon I could complete a flower in about 15 minutes. It's perfect busy work while watching a movie or chatting!

Here are my completed flowers on top of the book I "sacrificed" for this project. (Side note: I helped with VBS at my church this week, and one of the daily lessons was on sacrifice—how Jesus sacrificed his life to save us. The teacher did an illustration using q-tips and money showing that not everything we are asked to give up is a sacrifice ... and I think this book would fall under that category!)

I'm not sure yet what I'm going to do with the flowers—I guess I'll put them out as decoration somewhere. Aren't they cute?

Tuesday, May 29, 2012

i really should be working ...

I had my gallbladder removed last week. (That's a post for another day.) My yearbook submission date was May 25, but I knew there was no way I'd feel like working on yearbook right after my surgery, so I got an extension from my yearbook rep. Now I'm back at work and feeling good, so it's time to buckle down and finish the yearbook. So tonight, I silenced my phone, turned on some music, and sat down with a stack of spreads to proofread.

That was three hours ago. In those three hours, I did manage to proofread three spreads. But I also ...
  • Carried on a Facebook conversation with Blendy and Janae about The Bachelorette. I have somehow managed to be spoiler free so far this season, so I have no idea what's coming down the pike ... and I'd like to keep it that way! My top three right now are Arie, Doug, and Sean. And Kalon and Ryan so have to go!
  • Perused this list of celebrity Republicans. I have no idea how accurate it is, but I always knew I liked Freddie Prinze, Jr.!
  • Watched a couple episodes of What I Like About You. (Yes, Val, "Ground-Turkey-Hog-Day" was one of them!)
  • Fell into that black hole known as YouTube. Seriously! What is it about being under pressure that makes terrible fan videos so appealing?
  • Played "Words with Friends" on Facebook. I'm truly terrible, but I enjoy it—and I'd be willing to play any of you ... just send me a request!
  • Fell into that black hole known as Pinterest. I am totally trying this tightlining tip I found!
And now, it's time for bed. Maybe it's time to start using LeechBlock again!

Sunday, May 20, 2012

crafting with blendy & becky: rice heat therapy bag

The title of this post should actually be "Crafting with Susan & Becky"—when I told Blendy I wanted to make these rice therapy bags (discovered through Pinterest, of course) for our April craft project, she politely declined. So I turned to the woman whose help I would have needed to enlist anyway: my mom!

I think the last time I used a sewing machine, I was a freshman in high school. The sewing part of Home Ec was rather tramatic for me—we were required to make items of clothing and then wear them to school. This was bad enough on its own, but the day I chose to wear my terrible plaid jumper was also a day I stayed after school to work on yearbook. So did my cousin, who was responsible for the yearbook page of the yearbook ... and she took a picture of me working on my spread. So my horrible jumper is now immortalized on the pages of The Reflector. After that experience, I swore off sewing ... until now!

Apparently, when I swore off sewing, I really swore it off because I remembered virtually nothing. My mom had to basically hold my hand the whole way through—from cutting out the fabric to pinning it together to threading the sewing machine to actually sewing!

If you want detailed instructions, you should really go to "Sew, Mama, Sew!"—the site that inspired me. They give great directions! I didn't really follow their directions, though—I needed something simpler. So here's what I did ...

Find a fun fabric for your bag. Or you could do what I did and raid your mom's fabric scraps! (I didn't care if my bag was particularly beautiful ... after all, I was going to be the one sewing it!)

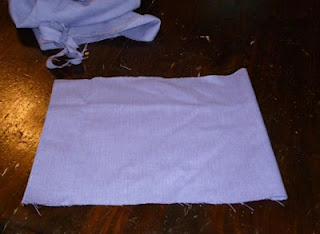
Cut fabric into approximately 8x20 inch rectangle. Fold in half to create 8x10 inch rectangle. If you have a fabric that doesn't look the same on both sides, be sure to fold so the right sides (what will be on the outside at the end) are together.

Pin on the three non-folded sides. Leave about four inches unpinned.

Sew. Try to keep your lines straight. (I was very bad at this.) Be sure not to sew the unpinned section.

Trim the edges and turn the fabric right side out.

Pour two pounds of rice into a bowl. Add 10-ish drops of essential oil and stir together. (You may need more or less—adjust until it smells right to you. I went WAY overboard with my cinnamon bark. Repeat after me: Less is more!)

Carefully fill bag with rice.

Stitch the hole closed. (Sorry, I can't give better directions for that—I did what Mom told me to do, but I don't think I can accurately describe it!)

To use your bag, heat it in the microwave in 30-second increments until it's as warm as you'd like.

Enjoy!


Note: This really was my April craft, and I did everything up to the rice part in April. It just took me a while to get my essential oils, so I finished in May.

Tuesday, January 31, 2012

crafting with blendy & becky: nail polished keys

I intended to do something else for my January craft, but I ran out of time! Blendy was out of town last weekend, so I had to go ahead with this craft without her. I think I was successful even without her guidance!

I've never been a huge fan of key covers, but I also hate shuffling through all my keys, trying to find the one I need to unlock my door. When I saw this on Pinterest, I knew I'd found January's craft project! It's super simple, and you probably already have everything you need on hand!

Step 1: Gather your supplies—keys, nail polish, clear spray paint, styrofoam (not pictured), and Ron Swanson. (Just kidding. Can you imagine what Ron would think of painting your keys with nail polish? Can you imagine what Ron would think of Pinterest?) Seriously, though, this will take a while, so you'll want to have a movie to watch. I mistakenly thought I could complete this project while catching up on last week's Parks & Rec. I was so, so wrong.


Step 2: Coat the top part of one side of each key with a layer of clear polish/base coat. After it dries, paint a thin layer of your desired color on the keys. Repeat until the color is as dark as you'd like. (I used five coats of the metallic purple and three of the others.)


Step 3: After keys are completely dry, flip over and repeat Step 2 on the back of each key. (When you think the keys are dry, wait another 10 minutes just to be safe. I learned this the hard way, and I had to redo the blue and pink keys ... )

Step 4: Once keys are absolutely dry, spray each side with clear spray paint to seal the polish. If you want to do this quickly without having to wait for one side to dry before spraying the other, find an old piece of styrofoam to prop the keys in. Then you can spray both sides quickly and leave the keys outside to dry. (I don't know if you really need this step. My guess is you'd just have to touch up the keys more often if you didn't spray paint them.)

And that's it! Doing my four keys took about two hours—or one episode of Parks & Rec followed by an incredibly stupid Lifetime movie. Seriously, if you read a book that detailed your sister's murder perfectly, wouldn't you be at least a little bit suspicious that the author may have had something to do with her death? But enough about that. Aren't the keys adorable?